 I love making my own toys. My DIY Tugging Box and Sensory Board for Babies would have to be two of my most popular posts on Laughing Kids Learn. Don’t forget to check them out at the end of this post.
Possum (aged 2.5 years) has very much entered the stage of independence and wanting to do everything herself. There are times that she is able to complete things with great success, however, we can often find that some tasks are a little beyond her current abilities and we then enter the stage of major frustration and tantrum territory. I know you know what I mean. 🙂
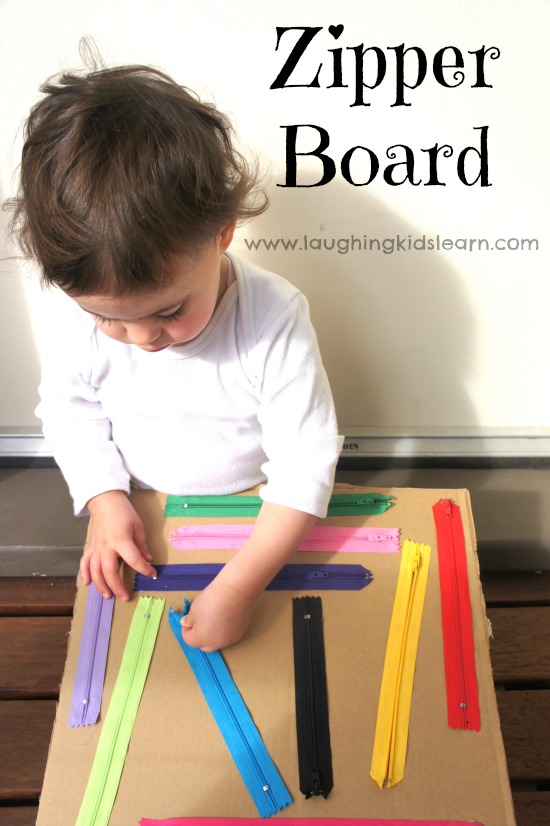
Whilst trying to dress herself, Possum became quite curious about a zip she found on a pair of pants. I demonstrated to her how a zip worked and she had a few attempts herself. It was from this point that I came up with the idea of a DIY zipper sensory board for kids! Simple, fun and educational.
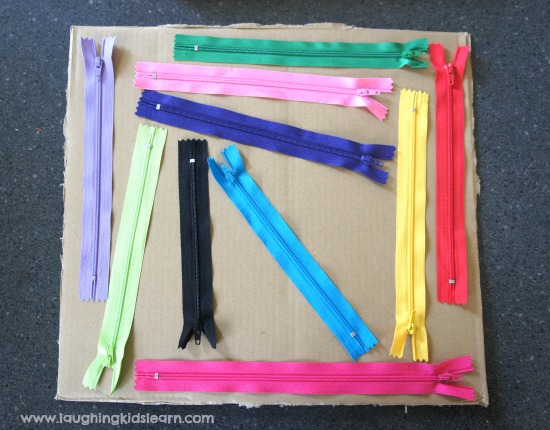
What you will need –
- Piece of cardboard
- Variety of zips (differing sizes and colours optional)
- Hot glue gun
- Scissors
How to make your own DIY zipper board for kids
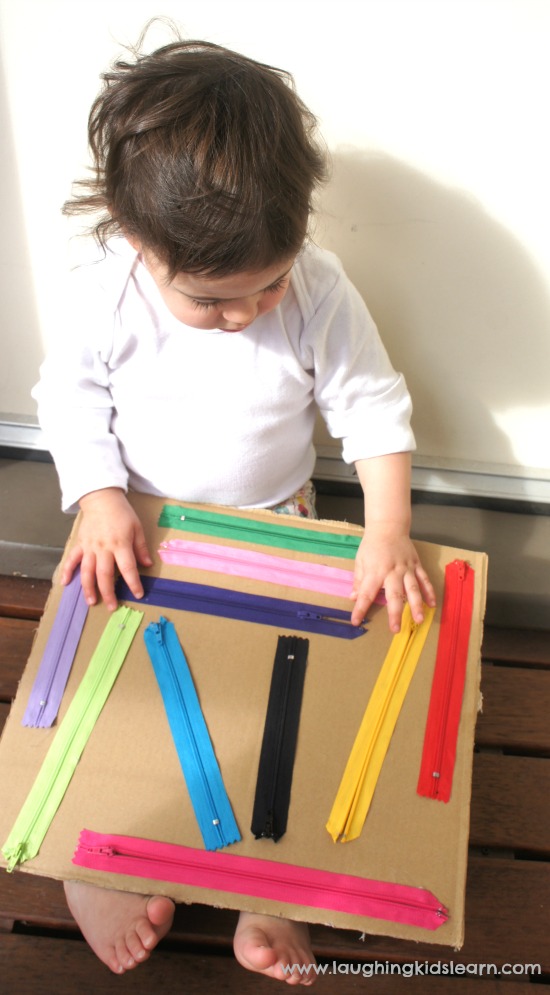
I began by cutting out a piece of cardboard from an old nappy box. I had 10 coloured zips for this sensory board and so I made the size of the board a suitable size so that all zips would fit. It’s a good idea to firstly decide how you ‘d like your zips to be positioned on the board. I considered how this board would be used during play and so making them zip in various directions was important to me.
Preparing your zips
It’s a good idea to check your zips are not able to completely separate once used. The ones I used had little metal staples at the end to ensure they didn’t come apart. If yours doesn’t have these metal staples, I’d suggest adding a staple yourself.
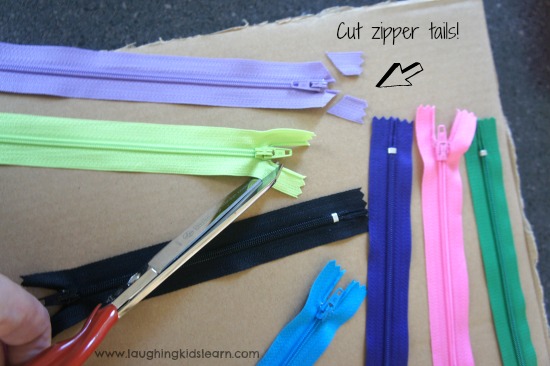
I found my zips didn’t sit completely flat when placed on the board. Using quality scissors, I cut off the tail ends of the zips, as clearly shown above.
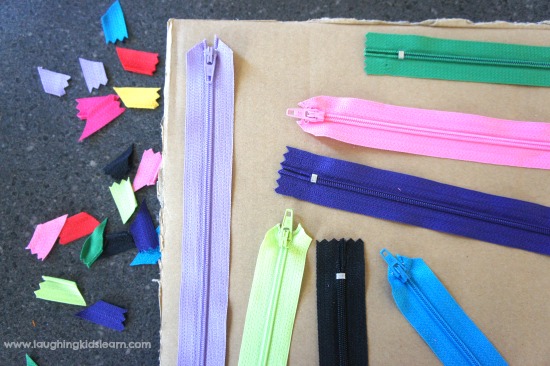
Doing this step allowed each zip to lay completely flat and ready for the next step.
Securing the zips to the board
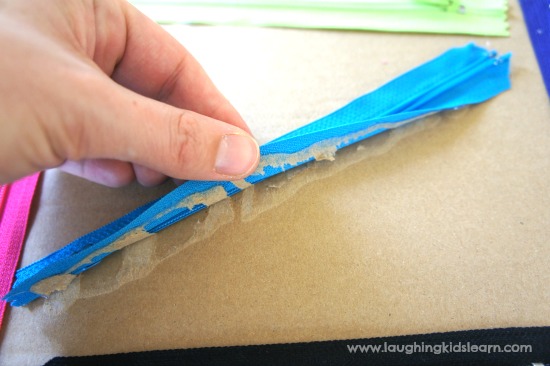
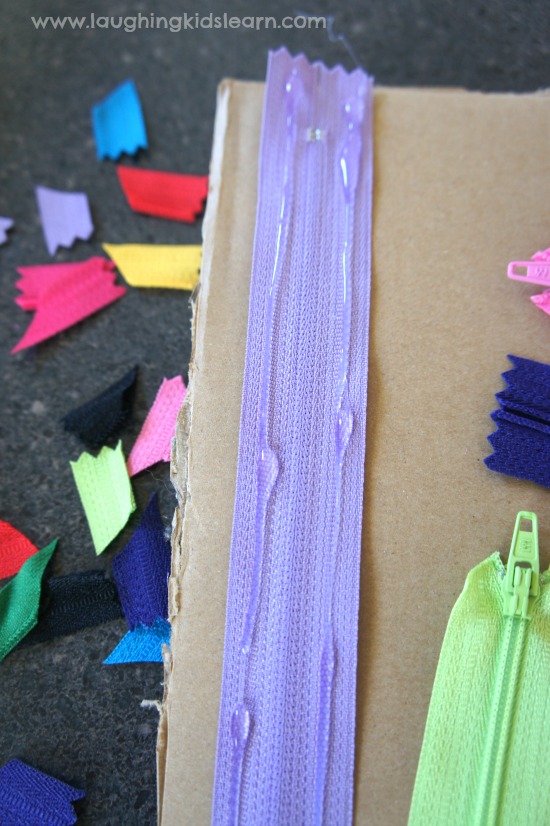
This is where things got a little tricky and I recommend this step only to be performed by an adult. Using a hot glue gun run a length of glue on either side of the zip, completely avoiding the middle area that will later be separated when the zip is opened.
Important things to remember –
- Use as little glue as possible as the glue will spread when secured to the board. You don’t want it to spread to that middle zip area and cause the zip to not open!
- Work quickly but carefully. The glue will be super hot but will dry quickly. You need your whits about you and I recommend not doing this when there are potential distractions (if that’s ever possible).
- Stick to the plan and know where each zip is going to be placed prior to adding any glue.
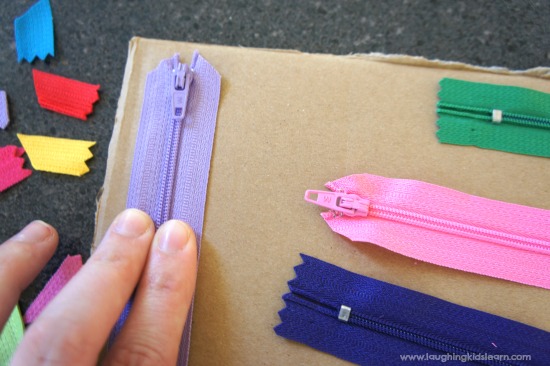
Once you have added your glue, add it to your cardboard and lightly press the zip into place. Remember, you want to avoid glue running into the middle of the zip so pressing/spreading the glue to the outer edges is a great idea.
Solving a potential problem
Of the 10 zips I did, there was only one that wouldn’t allow me to zip it from top to bottom. Clearly some of the hot glue made it’s way into the middle of the zip and sealed it closed. How I was able to easily solve this problem was pulling up one side of the zip and attempting the zip again. After a few attempts the problem was solved and I could secure the zip once again with some more glue.
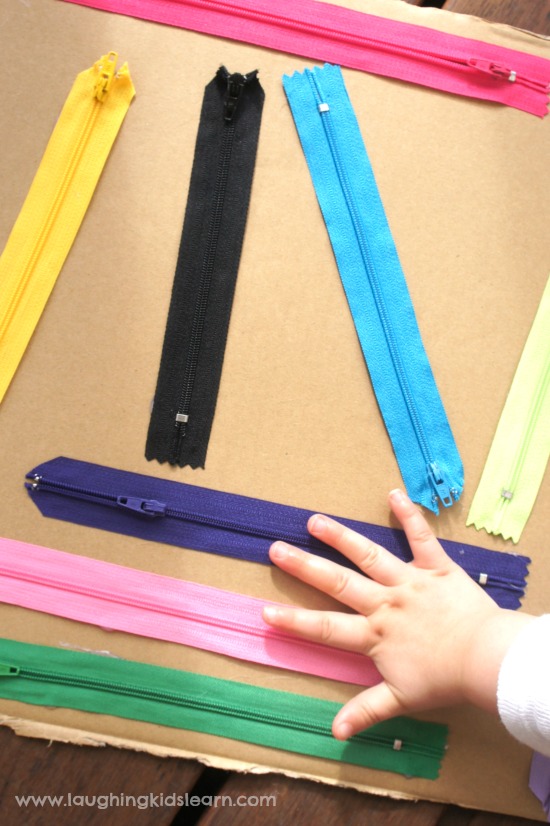
Learning achieved with this zipper board
Possum had a fabulous time playing with her own zipper board and did so most of the afternoon. In fact, she seems to play with lots of the learning actives, such as the DIY tugging box, I make for her. Possibly because I am tapping into her interests and stages of development. Key learning points achieved with this zipper board are –
- Fine motor skills
- Sensory awareness
- Identifying colours
- Discussing length of zips etc
This type of board would also be fabulous for those children to use when at the toilet training stage as it would keep them occupied enough to sit still. Could also be added to the car for those long car trips.
To be honest, this was such a simple activity board to make. It probably took me about 15 minutes to put together and the learning and fun that has already been achieved from Possum using it has been absolutely priceless. I know she will request to play with it tomorrow and no doubt the days after that.
I also really love that it’s an idea that would really suit babies through to preschoolers.
Would your child enjoy playing with a zipper board?
Look at what else we have done!
This is so great! My toddler is very curious about zippers right now! I will have to make him one of these boards 🙂
I love this idea! My son is 2.5 yo too and he would be so entertained trying to open and close the zippers. Great idea! I also loved your sensory board for babies. It’s great to make educational, fun toys all on your own.
Thanks Bea! I completely agree with you. I find myself making all sorts of things that I think my little one would like. I’m glad you’ve found some inspiration. Thanks for your comment. 🙂
Where did you find colored zippers? Thanks!
I purchased these from a craft shop in Australia called ‘Spotlight’. I’d have a look at your local haberdashery store for zips. Best wishes. 🙂
Do you have any problems with the zippers coming off the board? Although I love my hot glue gun, it is not always a permanent glue, especially on cardboard.
I probably had more of the opposite problem Sue. My hot glue gun stuck the zips down incredibly well to the point I had to be careful the zippers worked and didn’t join together! LOL Hope you have some luck with this.
Great idea for two and three year old will implement this in my school
YAY Sandra! You have made my day. Pop back and let me know how your little ones get on. 🙂
Kate its shell you have so many ideas you creative person you!! im going too send nic to the shop in boxhill to get velcro and spotlight for the zippers. Your an amazing mum and Possum is a beautiful addition to your blogs im so inspired. I will let you know when i create mine thanks from shell
Hi Michelle! How lovely of you to comment here. Little ‘Possum’ had lots of fun with those activities. They come out most days to be honest! Let me know how you get on. Hope you are well and we get to catch up soon. x
Hello, found you thanks to craft gossip. Great post! Thanks.
Hi Beatrice. Thank you for taking the time to comment and say hello! I hope you find lots more great ideas on my blog. 🙂
If you’re lucky, you will find at your Walmart during its back-to-school sale these adorable Little Z zipper pouches. They’re very small, but you can unzip them all the way out, zip them back, and they become a great little pouch. They come in several unisex colors, like a greenish-yellow and an orange. You could buy several of these, and when the child has earned it, give it to them to continue practicing with!
Hi,
Do you think this would work on a base other than cardboard? Maybe a stiff material? Want it for on a plane, so need it to be light & portable…
Awesome idea though, love it!
Hi Briony! This would be a great plane activity. I’m sure it could work with a stiff material and the zips could simply be sewn on. You could also make it so it was easily tied under the planes tray table. Best wishes with it Briony. Feel free to send me a picture of your work! 🙂
We attached the zips to a piece of felt (good practice on the sewing machine for my 10 year old!) and then sewed that onto a cheap cushion. My 11 month old loves it! She would totally have eaten the cardboard…
Love to hear alternatives. Thanks so much Alex. Sounds wonderful. 🙂
Oh my goodness I love this! My daughter is about the same age as your son and has started really loving zippers. This looks so easy to make and it doesn’t involve sewing. Total bonus! Thanks for the idea!
I’m so far from being able to sew Sara so this was an easy approach to a fun sensory/fine motor board. Glad you think it will suit your little one. Pop back and let me know how you get on. Thanks for your comment. 🙂
this is a really great idea!!!!! my 2.4 yr old loves trying to see what is inside the pillow!! LOL!
Oh Kate, exactly! This will be wonderful for your 2.4 year old. Hahaha
Since I have found that zippers are quite expensive I’m going to look through old clothing to see if I can gather enough to create the zipper board for my grandson who just turned 2 last week.
Will you be taking time off when the new baby arrives?
I always look forward to gett new ideas from you.
Hi Robin!
That is a really terrific idea to use zips from old clothing! I love that so much. I’m sure your grandson will really have a great time playing with his own zipper board. 🙂
Such a great questions Robin and how lovely of you to ask me. To be honest, I’m going to be playing it all by ear. I don’t really want to put too much pressure on myself to get blog posts out there while balancing a newborn (and toddler). I think I’ll just do what I can, however, I’m sure I’ll find it too hard to slow down or not blog my ideas.
Thank you kindly for your lovely message Robin. Wishing you a gorgeous week.
Kate x
Such an inventive idea! I love the simplicity in constructing it. Thanks for the great DIY toy!
I’ve got my board and zippers ready to go, but a question… I’m trying to figure out how to lay out the zippers. How did you find your little one playing with it? Is it better to have them running a similar direction, or all random and up/down/sideways? Thx!
Hi Tania! Fabulous question. I think it’s personal preference really. If you have a child with special needs then keeping it simple with the zips running in one direction would be best. My Possum loved testing out the zips and experimenting with their direction. I think you can’t really go wrong Tania so I’d just do what you feel would best suit your little one.
All the best lovely.
I found this on Pinterest. What a great idea! You’ve inspired me to make a zipper board for my Pre-k 3 class. Thanks ?
Oh Cynthia, that’s so wonderful! Thank you so kindly for leaving me a lovely message and I really do hope your class enjoy this idea. I made this awhile ago and it is still enjoyed today.
Just found this on Pinterest too. Planning a 13 hour road trip w/18 mth old. Found colorful zippers at Walmart and added stickers under the zippers to help her discover surprises and hopefully keep her interested longer. Glad I read all the instructions first so I didn’t over glue. Thanks so much, can’t wait for her momma to see it.
Hi Cindy! Thank you so kindly I’m thrilled you like this idea. It’s a great one.
Very nice ! It look colorful.I like it ,Thank for sharing this
Thank you Vanadum!
What a brilliant idea! I’m going to babysitting for a 1 and 3 year old pretty soon, and definitely keeping this fine motor activity in mind!
I love this ideas,I will do one for my pupils this september.i know they will love it.
Thanks Stephanie!! Pop back and let me know how you get on.